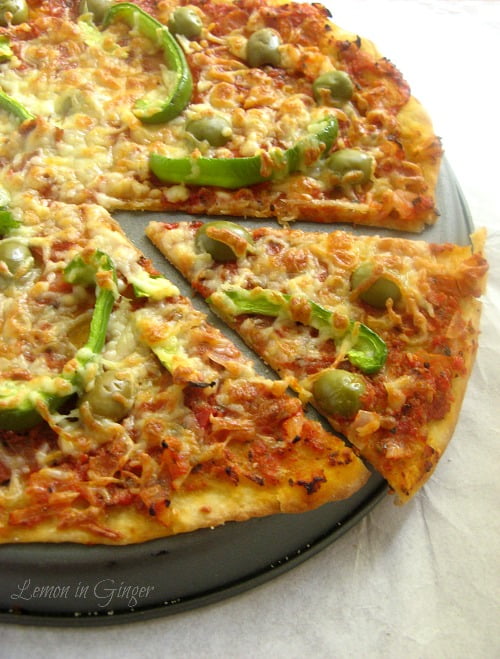
Peter Reinhart’s Napoletana Pizza is one of the best pizza this side of world. He is renowned for sharing one of the best and easiest recipe. It is a finger licking good kind of recipe.
Choose more pizza recipes here like roasted vegetable pizza, whole wheat pizza, beetroot pizza.
I was going to do this post later, but I got so many requests for the recipe and detailed post ever since I posted the preview images on FB group that I decided to do it earlier and push the post planned for today. SO all you HBG members, here is the recipe and detailed instructions for making pizza at home from scratch.
When I first thought of making pizza, I kept postponing it. Why? Because I fear the unknown. How can I make pizza at home? There must be special techniques/ pan/ equipment required. It can not be that simple.
These were few of my thoughts.
Peter Reinhart’s recipe has been touted as the best across blog-o-sphere and I was influenced, to say the least! Since I do not own his book, I chose to go with Heidi’s detailed instructions and recipe.
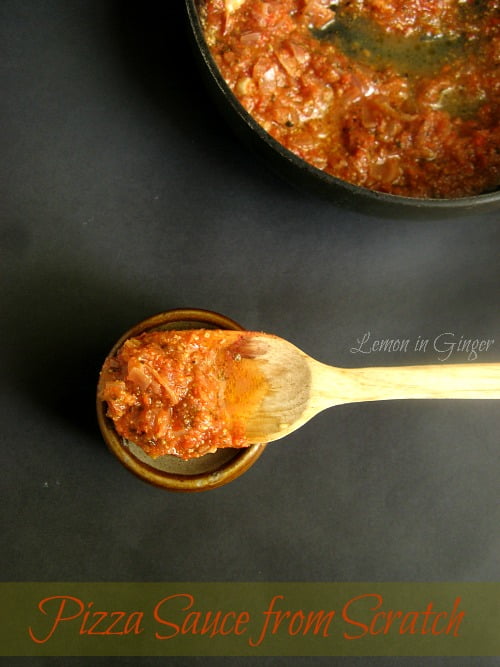
If I am making the pizza, I had this niggling thought, why not make the pizza sauce at home? Why not jump in, why test waters only? So came across the recipe for sauce at home, on food network which had very good reviews.
All in all I was set for a pizza at home. And when I started doing it I realized how simple and easy it is. The dough is pre-made, the sauce is pre-made. You only need to rise the dough for 2 hours before ready to roll and bake the pizza.
It was a breeze. Without a pizza stone. You don’t know what it is? Even I don’t know?
I sent kid and V to school and office respectively and set about rising the dough. After 2 hours, I rolled it quite easily and then was happily putting together the most scrumptious pizza I ever had.
I used minimal toppings – sauce, cheese, green pepper and olives. The less the better.
After the first bite I realized that this truly is the simplest, easiest, tastiest, yummiest and bestest pizza I ever had. I know bestest is no word. But I am pizza crazy at the moment so excuse me, please!
I have kicked myself 100 times during the pizza making process and I am sore! I don’t have a fetish, please relax. I kicked myself for not attempting, pizza sauce and pizza at home. It is so simple. Now pizza dough is going to be a permanent feature in my freezer.
How to Make Peter Reinhart’s Napoletana Pizza?
Peter Reinhart Napoletana Pizza from Scratch
Ingredients
for the dough
- 2¼ cup all purpose flour chilled
- 1 tsp salt
- ½ tsp instant yeast
- ⅛ cup olive oil
- ¾ cup water ice cold (start with 1 tbsp less water in ¾ cup)
for the sauce
- 2 tbsp olive oil
- 1 tbsp butter softened
- ½ cup onion chopped
- ¼ cup celery chopped
- 1 cup tomato sauce ⅜ cup tomato paste + ½ cup water
- ½ cup tomato paste
- 2 tbsp cheese grated
- 1 tsp dried basil
- 1 tsp dried oregano
- ½ tsp salt
- ½ tsp sugar
- ¼ tsp black pepper crushed
- 1 bayleaf tejpat, small
- 1 tsp fennel seeds
- 1-2 tbsp tomato ketchup sauce, optional for bright red color
for the pizza
- mozzarella cheese grated
- toppings of your choice
- semolina flour or cornmeal for dusting
Instructions
For the Dough:
- In a large bowl, stir together flour, salt and yeast.
- Add in oil and cold water. Using a metal spoon or your hand or a dough hook, bring together the dough till it forms a smooth and sticky dough. It should take about 5-7 minutes. The dough should clear the sides and stick to the bottom of the bowl. If the dough is too sticky and doesn’t come off the sides of the bowl, then add in some flour to help release the sides. If it clears the bottom of the bowl, dribble in a teaspoon or two of cold water. The finished dough should be springy, elastic and sticky but not tacky.
- Sprinkle flour on the counter and transfer the dough to it. Prepare a sheet pan by lining it with baking parchment paper and greasing it.
- Using a metal scraper or sharp knife, divide the dough into 3 equal pieces. You can divide into 2 also if you are comfortable shaping bigger pizza. Dip the scraper or knife in cold water between cuts if the dough is sticking to it.
- Sprinkle flour over the dough. Make sure your hands are dry and then flour them. Gently round each piece into a round ball. If the dough sticks to your hand, dip your hands in flour again. Transfer the dough balls to the sheet pan, mist them generously with oil and slip the sheet pan into a zip-lock bag. Put the pan into the refrigerator overnight to the rest the dough. You can keep it in refrigerator for upto 3 days.
- At this point you can store these dough balls for future baking. After rounding each ball in above step, just coat them liberally with oil and transfer each ball in a separate freezer bag. Store in freezer for upto 3 months. Transfer the desired number of balls to the refrigerator the day before you plan to make pizza.
- On the day of making pizza, remove the required number of balls 2 hours before making the pizza.
- Dust the counter with flour, and then mist the counter with spray oil. Place the dough balls on top of the floured counter and sprinkle them with flour. Dust your hands with flour.
- Gently press the dough into flat disks about 1/2 inch thick and 5 inches in diameter. Sprinkle it with more flour and mist with little spray oil. Cover with loose plastic wrap or a ziplock bag. Let it rest for 2 hours.
- Pre-heat the oven to 250 °C as most home ovens don't go beyond this. If yours have higher setting, go for the higher setting. The oven should be as hot as possible.
- Generously dust the back of a sheet pan with semolina flour or cornmeal.
- Make the pizzas one at a time. Generously flour the counter with flour and using a rolling pin roll the pizza. Keep re-flouring the counter or rolling-pin if required. If you are having trouble extending the dough outward, let it rest for 5-20 minutes, to let the gluten relax and then try again.
- When the dough is stretched to your satisfaction (about 6 to 9 inch for 1 dough ball), place the rolling pin on one edge of the rolled dough. Slowly wrap the pizza dough onto the rolling pin while rolling it from one end to the other. Now take the rolling pin with pizza dough wrapped on it to the prepared pan and lay it on starting with one edge and slowly rolling it in reverse direction of the wrapped dough so that it unrolls easily. Make sure there is enough semolina or cornmeal to slide it off.
- Lightly top it with sauce and pizza toppings of your choice.
- Place the pan into the pre-heated oven and bake for 5-15 minutes depending on how hot your oven is. The pizza doesn’t take long to bake, so keep as eye and as soon as it is baked and cheese caramelizes. Rotate the pan if required for even baking. If the top is done faster than move the pizza to the lower shelf or vice-versa if the base crisps before cheese caramelizes, then move it to higher rack for baking.
- Remove pizza when done from oven and slide off the pan onto a cutting board. Allow the cheese to set slightly for 3-5 minutes and then slice and serve. Enjoy pizza from scratch.
for the sauce:
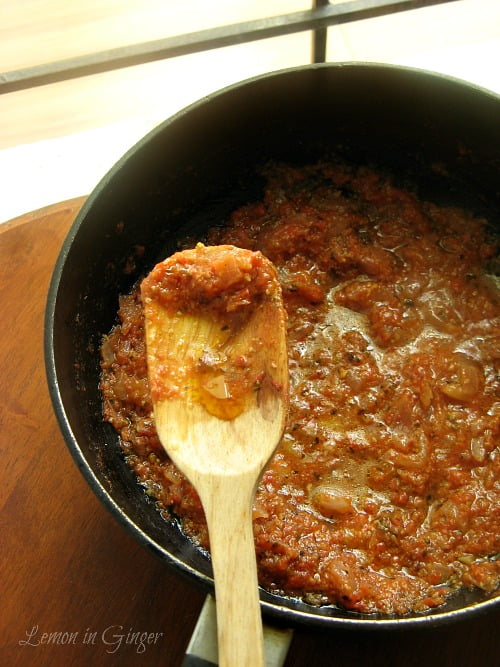
- In a large skillet, melt butter with oil. Add the onion and celery. Saute until soft and transparent.
- Add tomato sauce and tomato paste and stir well.
- Add the remaining ingredients and bring to slow simmer.
- Simmer for 30-60 minutes (or not at all depending on your taste and time frame).
- Remove the bayleaf and spread the sauce on the prepared pizza dough.
Notes
- Using olive oil in the dough is optional, but it is recommended as it gives a moist and supple dough.
- You can mix the dough using a paddle attachment on low speed. If you are mixing by hand, try copying a vigorous motion of a dough hook, while rotating bowl in circular motion with the other hand. Reverse the circular motion few times to develop gluten further. If you are using electric mixer, then change to dough hooks and do it for 5-7 minutes on medium speed or till the dough comes together as smooth and sticky.
- Repeatedly dip the metal spoon, hand or dough hook in cold water during the dough process.
- You can use the traditional method of rolling the dough for pizza using your knuckles as described by Heidi. I have not attempted it.
- My pizza was done in 12 minutes. So keep a careful eye on your pizza.


hi deepali this is really fabulous one turned very preety… visit my space whn u have time
http://www.sujithaeasycooking.net/
hi deepali this is really fabulous one turned very pretty… visit my space whn u have time
http://www.sujithaeasycooking.net/
Thanks Sujitha. I will surely visit your space.
This is yummyyy…I am drooling over all the pictures..I wish I could come and visit and gobble the whole thing up…hihi..too good dear..
Thank you Deepa. I just went over your blog and you have some beautiful images…!
This is my favorite pizza. Thank you for attaching beautiful baking. I invite you again.
Thanks Wisla. I will surely be linking again!
A thin crust, just the way I like it. Good job! And nice photos too. Thank you for contributing to Panissimo.
Thank you Simona. I feel extra nice for images as they are shot using point and shoot and not dSLR :)
Fabulous. Thanks for linking this to my event. Looking for more wonderful recipes like this.
On-going event: Dish it out: Coconut and sugar/salt.
Hi!
Can you tell me how many grams of flour is 2.5 cups?
Actually I followed Heidi’s recipe and there it’s mentioned to use 4.5 cups of APF.
Is a cup of flour equals to 125 ml cup??
I used my 125ml measuring cup to measure 1 cup of flour but the dough looked a pourable cake batter!! So I ended up using 2 cups more (125 ML CUP)
Am I doing something wrong?
Hi Urooj, I got both your messages. 1 cup is 125g. I have made this recipe 3-4 times and the proportions are right. what brand of flour are you using? Try using a branded one available in marts and not loose available from local grocery store. Also, add water 1-2 tsp at a time, you may not need to add all the water written in the recipe.
Let me know if it turns out better in second attempt.
Thanks for replying!
I don’t use loose flour. I buy packed flour from my supermarket.
See, I am using 125ml cup, is that the problem? Since it’s not the measure of mass? But then again I see chefs using cups all the time! :( :'(
I think I am gonna use my kitchen scale next time.
Thanks for the support.
Hi Deepali!
Just wanted to tell you that today I used kitchen scale to measure my ingredients and the dough came out perfect! :) soo excited!
Also, can i make a bit thicker crust with this dough?
And can this dough be used for making other baked goods like calzones or pizza pockets??
Awaiting your reply!
Thanks a lot! :)
Great!! Yes you can roll as thick or thin you want. I prefer thin crust, so I tend to roll accordingly.
This dough should be usable for other recipes too, though I have never tried or contemplated using it like that. If you do try calzones or pizza pockets, then do let me know how they turn out.