 Print Recipe
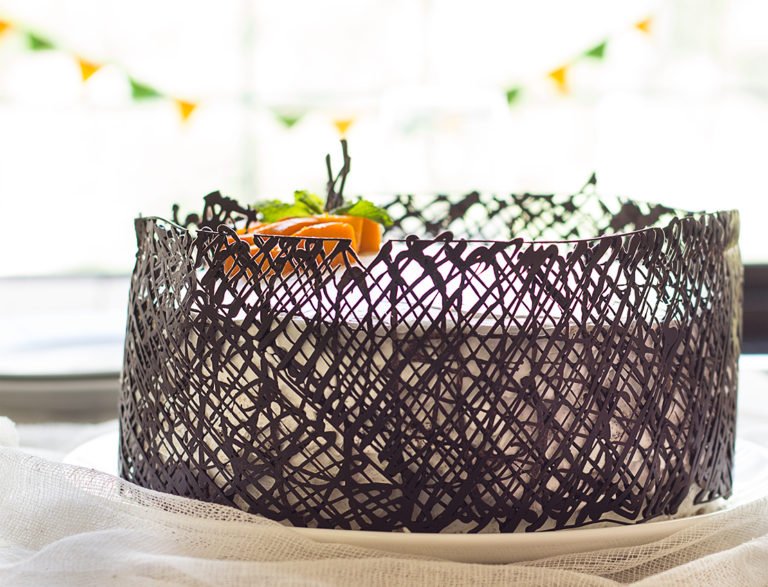
Chocolate Collar Cake is a decadent, gooey, yummy chocolate cake wrapped in a chocolate collar. The cake is not only beautiful to look at but delicious in every bite.

Some more mouth-watering cakes on the blog here are old-fashioned chocolate cake, hand-painted cake, and rainbow cake.
The base recipe is from my all-time go-to chocolate cake. You can frost, top, or chill it any way you like. It makes the perfect base for a layered cake recipe.

To make the chocolate collar:
- you need to cut a parchment paper strip of the height of the assembled cake and the circumference of the cake.
- Place the strip on a flat counter/ table top and tape the short ends to the counter. This will keep the strip stationary while you spread the chocolate.
- Now melt the chocolate in 30 seconds spurts in the microwave and mix it well or temper it if using pure chocolate.
- Pour into a piping bag.
- Spread or pipe it on butter paper/ parchment paper in any pattern you like. Allow it to be slightly set. To check, gently touch it with one finger and it should leave a gentle impression on the chocolate without completely smudging it.
- Pick up the paper strip gently and quickly wrap it around the cake, matching one edge of the strip with the bottom edge of the cake.
- Tip: For the best result, use a turntable for the cake. It is easier and simpler to just turn the table around while sticking the paper onto the cake.

I made this cake on order for a neighbor and she loved it. I am so glad I took up this order. She gave me complete free hand to design, choose the flavor etc.

And voila! super tasty, drool-worthy, chocolate collar cake is ready.
How to Make Chocolate Collar Cake at Home?

Chocolate Collar Cake
Chocolate Collar Cake is a decadent, gooey, yummy chocolate cake wrapped in a chocolate collar. The cake is not only beautiful to look at but delicious in every bite.
Servings: 8 inch layered cake
Ingredients
for the cake:
- 1 cup all purpose flour
- ½ cup +1 tbsp sugar granulated
- ⅛ cup + 1 tsp cocoa powder unsweetened
- ¼ tsp baking soda heaped
- ¼ tsp salt
- ⅔ cup hot water
- 4 tbsp olive oil
- 2 tsp white vinegar
- 1 tsp instant coffee granules
- 1 tsp vanilla extract
- chocolate ganache for filling and covering the cake
- 200 gram dark chocolate melted
Instructions
for the cake:
- Pre-heat oven to 180 °C. Line the bottom of one 8 inch pan.
- Whisk together flour, sugar, cocoa, baking soda & salt in a large mixing bowl. Do not use mixer.
- Combine water, oil, vinegar, instant coffee & vanilla in a separate bowl.
- Add to the dry ingredients & whisk till just combined. A few lumps are fine.
- Pour batter into the prepared pan & bake for 20-25 mins till tooth pick inserted in center comes out clean.
- Cool the cake in the pan on the rack for 15 minutes, then invert it on the rack. Leave it upside down to cool, it helps in flattening any dome shape.
- I baked three layers by baking this recipe thrice separately. And then froze the layers wrapped in cling film.
for the collar:
- you need to cut a parchment paper strip of the height of the assembled cake and the circumference of the cake.
- Place the strip on a flat counter/ table top and tape the short ends to the counter. This will keep the strip stationary while you spread the chocolate.
- Now melt the chocolate in 30 seconds spurts in the microwave and mix it well or temper it if using pure chocolate.
- Pour into a piping bag.
- Spread or pipe it on butter paper/ parchment paper in any pattern you like. Allow it to be slightly set. To check, gently touch it with one finger and it should leave a gentle impression on the chocolate without completely smudging it.
- Pick up the paper strip gently and quickly wrap it around the cake, matching one edge of the strip with the bottom edge of the cake.
- Tip: For the best result, use a turntable for the cake. It is easier and simpler to just turn the table around while sticking the paper onto the cake.
Notes
- Old Fashioned Chocolate Cake: Truffle Cake
- Chocolate Ganache
- You can make a full recipe cake and then slice into three layers or alternatively you can bake 3 layers in separate pans by placing them in a big oven together.
- You can whip the ganache before spreading as filling.
- The consistency of ganache for topping and filling is different. For filling, you need thick consistency (which you get by leaving the ganache at room temperature for few hours) and for pouring as topping, you need the ganache to be pouring consistency. You can re-heat/ warm up the ganache to adjust the consistency.
- For the best result, use a turntable for the cake. It is easier and simpler to just turn the table around while sticking the collar paper onto the cake.
Sugar Syrup
Easy Sugar Syrup recipe to soak cakes & bakes
Servings: 1 cup syrup
Ingredients
- ⅓ cup sugar granulated
- 1 cup water
Instructions
- Boil water & sugar together. Once it boils, lower the flame & allow it to heat for another 1 minute. Remove from heat & cool completely. It can be made in advance & stored in refrigerator.
- Use ⅓ cup of syrup to soak one layer of cake. If you are soaking White Cake then reduce the syrup per layer i.e. ¼ cup sugar in ¾ cup water. And soak each layer in ¼ cup syrup. With ⅓ cup syrup, I have found the cake to get over soaked.
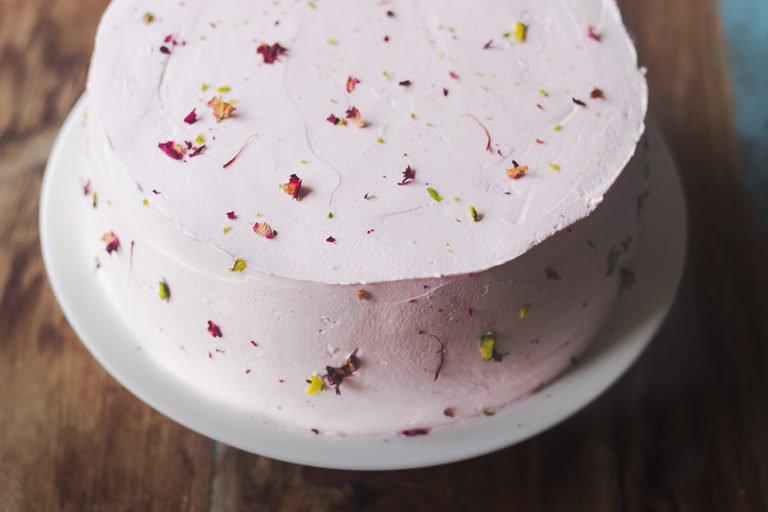
for infusing flavor
- If you are infusing flavor like rose petals, then boil petals once sugar is dissolved for 5-10 minutes. Cool & strain. Continue to use for soaking and assembling.
Notes
- The more you soak the layers before filling, the more moist your cake will be.
- You can infuse this syrup with flavors of your choice. I have used it with dried rose cake by infusing it with 1 cup dried rose petals.

How To Make Chocolate Ganache
Chocolate Ganache is a very versatile and basic preparation. By learning how to make chocolate ganache, the sky is the limit. Use it as filling, frosting or even as set mousse or in cheesecakes and tarts.
Servings: 220 ml
Ingredients
- 250 gram dark chocolate finely chopped
- 200 ml heavy whipping cream
- 1 tbsp unsalted butter softened
Instructions
- Put chopped chocolate in a large heat proof bowl & keep aside.
- In a saucepan, heat cream & butter on medium heat. As soon as it starts to boil, remove from flame & pour over chopped chocolate. Allow it to stand without mixing for few mins (about 3-4 mins). Do not stir as we do not want to incorporate air in Ganache.
- Using a wooden spoon/ rubber spatula or whisk, gently stir by beginning in the center & gently moving out to the edge of the bowl. When the chocolate is fully melted & mixture is smooth, add any liqueur or liquid flavorings (all should be at room temp.)
- Allow it to cool down completely & set properly. Before storing, cover with a piece of plastic wrap pressed on the top of the ganache so a film doesn’t form.It can be stored at room temp in a cool corner for 2 days & freeze upto 3 months.
Notes
- The consistency of ganache for topping and filling is different. For filling, you need thick consistency (which you get by leaving the ganache at room temperature for few hours) and for pouring as topping, you need the ganache to be pouring consistency. You can re-heat/ warm up the ganache to adjust the consistency.
- The proportion between cream and chocolate will vary based on the usage. If you wish to use ganache for filling up a cake and thick glaze then the proportion is 1:1, equal parts chocolate and equal parts cream. For making chocolate truffles, use 2:1 ratio, with 2 parts chocolate and 1 part cream and for soft icing and pourable glaze the proportion of cream is higher i.e. 1:2, 1 part chocolate and 2 parts cream.
How to Assemble a Cake
Easy steps on How to Assemble a Cake. Follow them to create a layered cake in a jiffy.
Yield: 6 inch layered cake
Equipment
- piping bag, nozzles & levelling knife for decorating and finishing
- parchment paper or strips
Materials
- sugar syrup or chocolate syrup for soaking
- whipped cream or chocolate ganache or buttercream to fill & frost
- fruits, sprinkles, chocolate chips, etc for topping or filling
Instructions
- Move the frozen layers to refrigerator few hours before assembling. Place the first layer on a platter or cake stand.
- Make some holes into the bottom layer using a form. Soak the bottom layer in sugar syrup. Then lightly spread the filling of your choice like whipped cream or butter cream or chocolate ganache over it. Place the second layer on top of the bottom layer & repeat the process of soaking & spreading filling. Finally place the top layer & again soak it. Lightly spread the filling on top & sides of the cake making a crumb coat. Refrigerate the cake for 1 hour.
- Top it generously with chocolate ganache or any glaze or whipped cream or butter cream. Pipe design as you would like. Refrigerate the cake for at least 2 hours or overnight for flavors to set in. Serve chilled.
Notes
- You can whip the ganache before spreading as filling.
- The consistency of ganache for topping and filling is different. For filling, you need thick consistency (which you get by leaving the ganache at room temperature for few hours) and for pouring as topping, you need the ganache to be pouring consistency. You can re-heat/ warm up the ganache to adjust the consistency.
- I use soy-based ready-to-whip cream which is available in market. Transfer a small portion of cream in a large bowl or your stand mixer and beat till stiff peaks are achieved. Fill and frost as per your choice.


Join the Conversation
We'd love to hear your thoughts