 Print Recipe
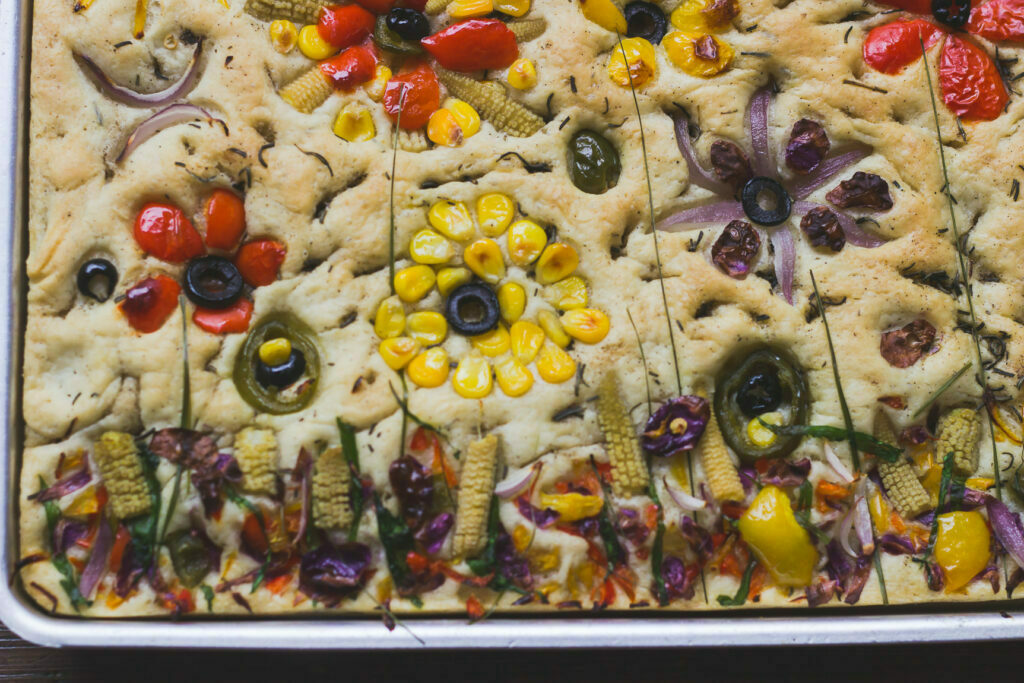
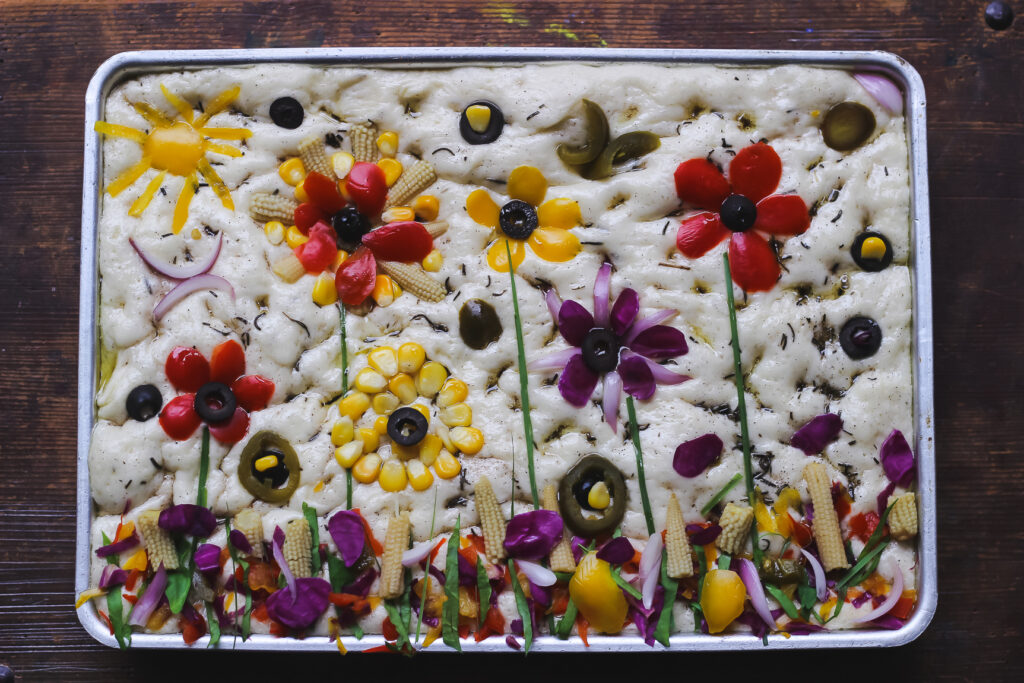
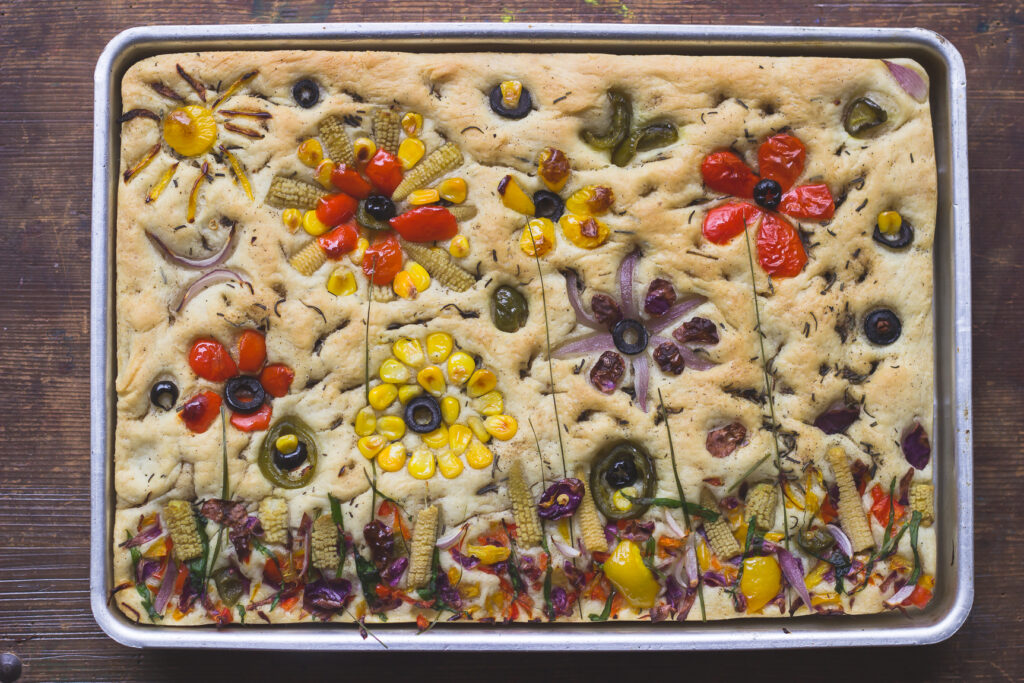
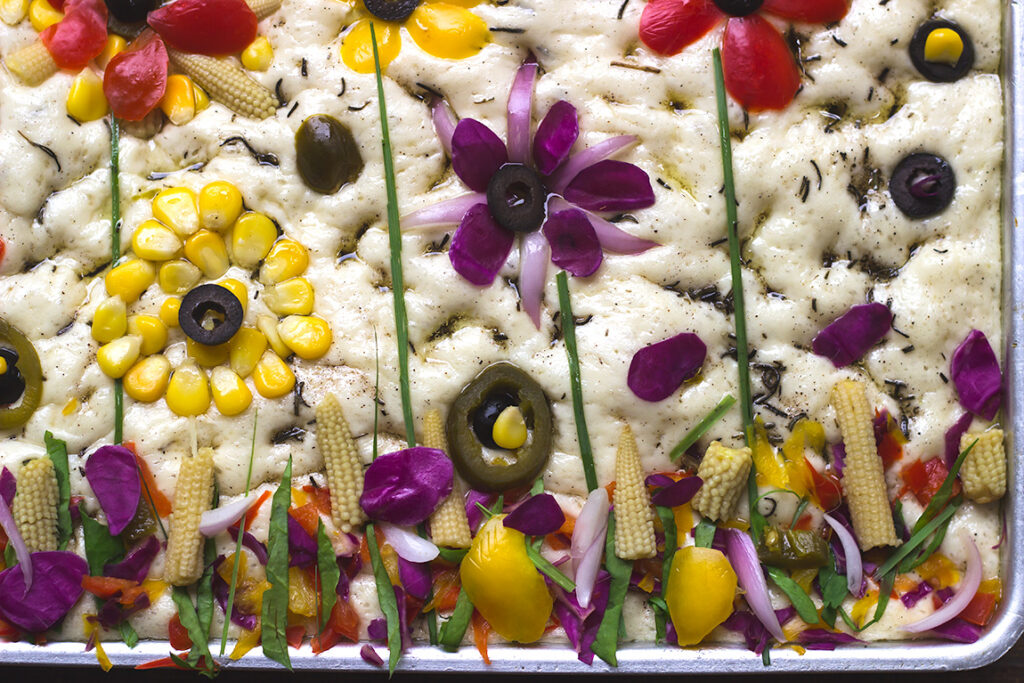
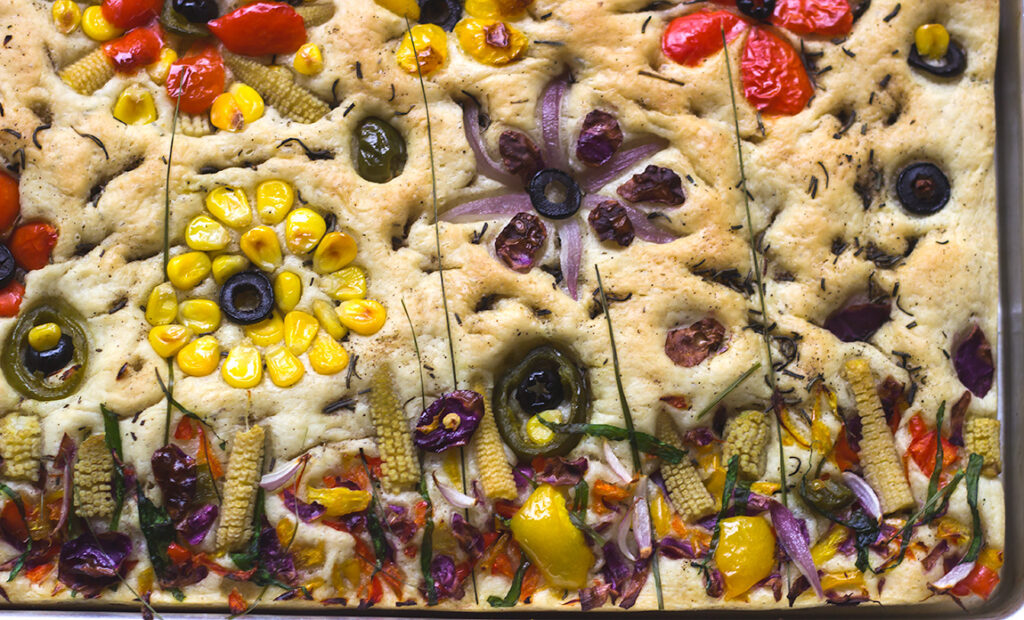
Garden Focaccia is soft, and pillowy, with olive oil crust, and golden bread, and totally mouth-watering and irresistible.
is a bread recipe for beginners and experts because it is forgiving – all levels of skill can experiment with it. It is super simple and delicious to bite into. Soft, chewy, no-knead and just comes together superbly every time. There are other focaccias to choose from here like whole wheat focaccia, beetroot focaccia, etc.
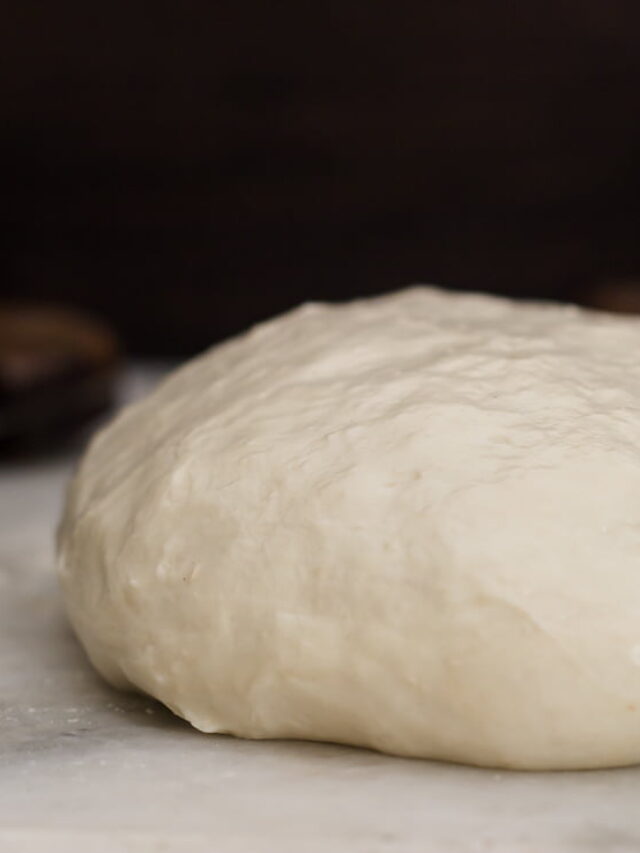
So far, this is my favorite recipe, which is no-knead, and takes barely 5-7 minutes to put together. It is an overnight refrigerator focaccia recipe without any shaping technique or scoring.
Long cold refrigerator rise is the best! It not only allows the yeast to rise naturally without sugar but it is also extremely handy for people like me, who want to make bread at home, without spending hours laboring on the same day. It allows us to prepare the dough in advance and bake it at our convenience.
Few tips for the perfect bread and its dimples intact :)
- Allow the dough to rise for 20-24 hours for best results. You can leave the dough in the refrigerator for up to 72 hours though.
- To avoid the dough from sticking to the pan use both butter and oil to grease the dish. Do not skimp on this.
- You would need anywhere between 2-4 hours depending on the temperature of your kitchen and the season for the second rise.
- To maintain those cute and characteristic dimples of focaccia, it is best to stick the pans in the oven immediately after dimpling the dough. If you allow the dough to rise again for 20 minutes or more, then the dough rises and loses those cute dimples.
- Olive oil should be applied both on the bottom of the pan as well as the top of the pan. It encourages awesome flavor, as well as nice golden brown color.
- Topping: The quintessential topping is rosemary but you can have sun-dried tomatoes, basil, olives, or a whole garden as I did here on top.
How to Make Garden Focaccia in Simple Steps?

Garden Focaccia
Ingredients
for the dough:
- 4 cup all purpose flour
- 2 cup water lukewarm
- 4-5 tbsp olive oil
- 2 tsp instant yeast
- 2 tsp salt
for topping:
- 4-5 tbsp olive oil
- to taste salt flakes
- 1 tbsp rosemary
- vegetables cut to shape optional
Instructions
- In a large-sized bowl, whisk together the flour, salt, and yeast.
- Now add water to the mix.
- Use a wooden spoon to mix the dough.
- Pour olive oil on top of the dough. The oil should be enough to coat the top of the dough generously.
- Without mixing the oil, cover the bowl with cling film tightly after removing all air. If you are using a tea towel, use more oil and cover it tightly with a rubberband to make it more airtight. If you do not slick the dough with sufficient oil, then the top layer may dry out leaving a hard and dried crust on top.
- After 18-24 hours, when you are ready to bake, prepare the rectangular Pyrex pan or a sheet pan by greasing it with both butter and olive oil. First, apply a layer of butter and then pour 1 tbsp olive oil and spread it evenly.
- Now remove the bowl from the refrigerator and uncover it.
- Punch the dough down and transfer it to a prepared rectangular Pyrex pan or a sheet pan.
- Do not spread or shape the dough. Please do not touch the dough again for 2-4 hours (depending on your environment) after transferring. The dough will spread in the pan on it’s own.
- In the meanwhile, preheat the oven to 425 °F for 20 minutes.
- After 2-4 hours, it will spread nicely in the pan. Time to dimple it!
- First sprinkle salt flakes on it. Then sprinkle rosemary on it.
- Now pour 2 tbsp olive oil on top of the dough. Using your fingers, press the dough down deep, making cute dimples.
- Again sprinkle salt on top.
- Immediately place the pan in the pre-heated oven. Bake for 25-30 minutes till nicely golden brown all over. Remove the pans from the oven and cool on cooling racks.
Notes
- If you are using a tea towel, use more oil and cover it tightly with a rubberband to make it more airtight. If you do not slick the dough with sufficient oil, then the top layer may dry out leaving a hard and dried crust on top.
- You can toppings after dimpling as I did here as they wouldn’t have made a garden beauty otherwise. But you can add before dimpling or mix in the dough in the first step itself. The key is to ensure that the toppings don’t burn while baking.
- Best ref site


Join the Conversation
We'd love to hear your thoughts