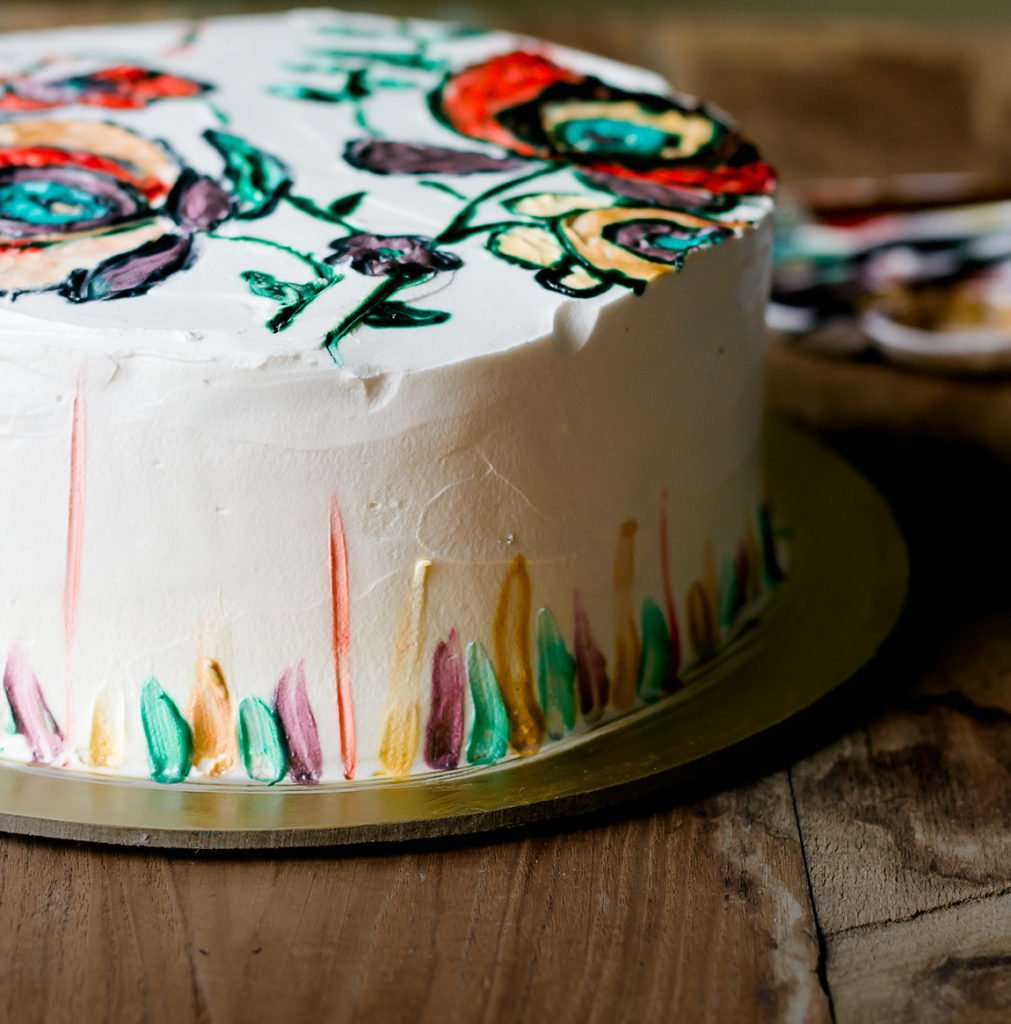
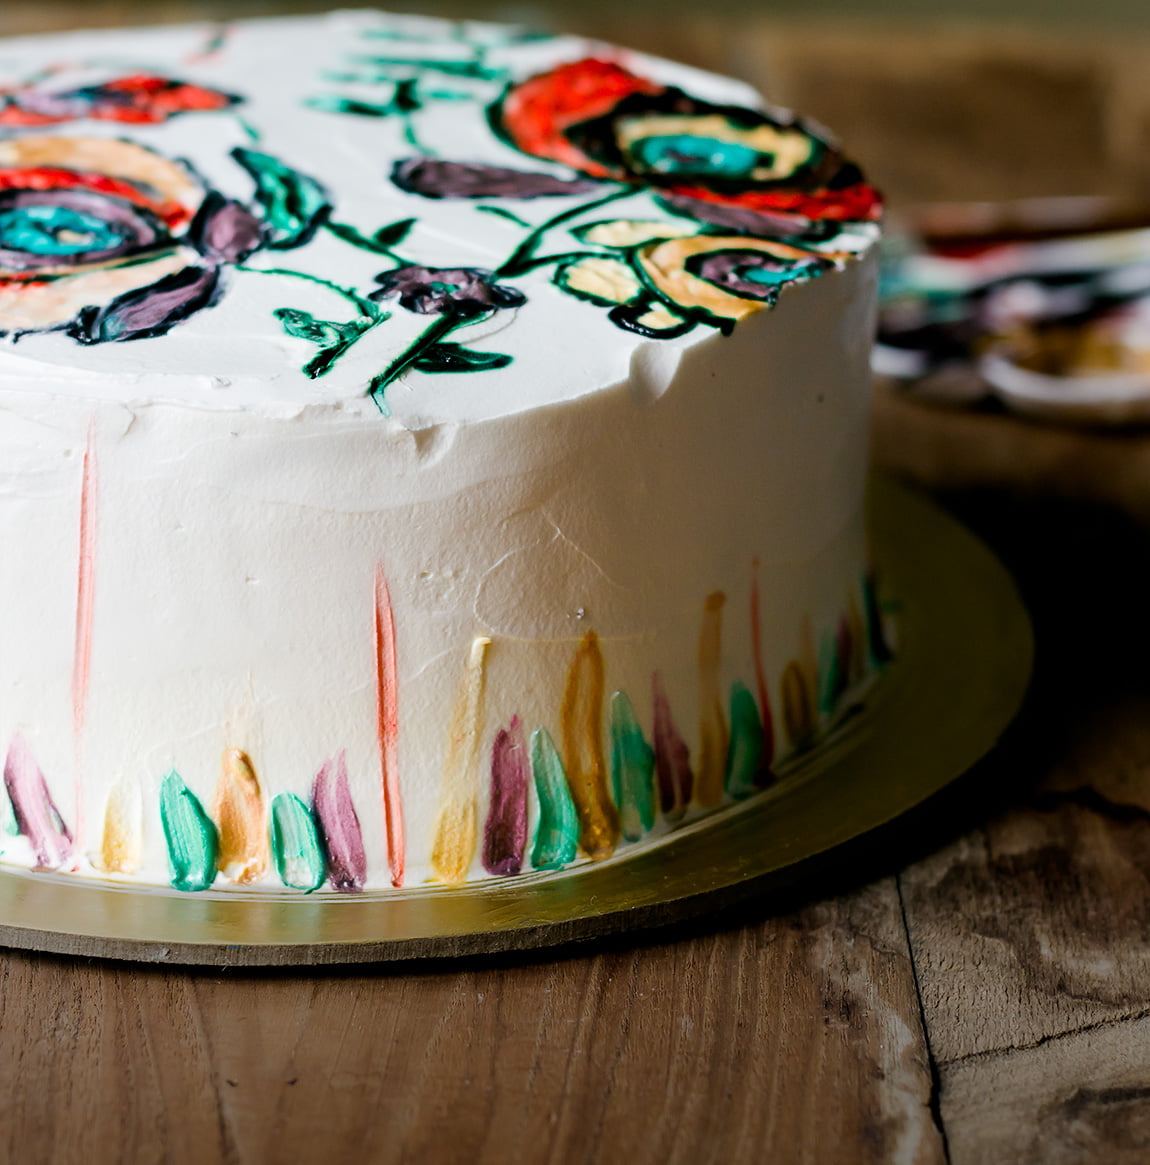
Hand Painted Cake is a delicious layered cake made with chocolate cake as a base. Soaked in simple sugar syrup and frosted with whipped cream. It is then hand-painted on top. The trick for hand-painting is to chill the cake perfectly. Read on to know more.
After joining a group of very talented and active home baker entrepreneurs I am learning and soaking in so many techniques, baking gyan, flavors and trends, etc.

Most of them I feel too scared to attempt but some I experiment in my own style. One such is painting on the cake. I was so reluctant to do it for the simple reason that I didn’t have any confidence in my design and painting efforts.
Kids came to my rescue and painted on the cake with a lot of love, tears, and some mess along with hooting from the little one (Do watch the video). I could have corrected the imperfections on Photoshop but I didn’t want to. They were a part of the labor of love by the kids.
Painting was a novel experience and one I would love to explore more, it is neither as difficult as it seems nor as easy as I would want it to be. The best would have been outlining the design with black ganache and giving a more uniform effect.
The pressure of the brush or whatever you use needs to be very mild. For best effect, cover the cake with fondant before painting but since I don’t like fondant, I painted directly on whipped cream.
Also, I feel using runny paints would work better in spreading it. This I need to explore more before guiding you guys. However, you do need to mix vodka with paint to get the spreading consistency as we do for our watercolors or oil paints.
For people looking for non-alcoholic options, I saw some videos online suggesting using water to dilute. However, I feel it may work for buttercream but maybe not for whipped cream. I will discuss more when I have learned more.

Oh and BTW, you get separate edible painting colors in the bake supply store easily,
but you can use any gel-based or powder color. I don’t use water-based colors so no idea if they would work or not.
I kept the recipe of cake simple using only ganache to fill the cake and soaking the layers in a little bit of sugar syrup.
You can make a full recipe cake and then slice it into three layers
but I am not very neat with slicing, hence cut down the recipe to make 3 separate layers.
Alternatively, you can bake 3 layers in a big oven together but I don’t have that too.

The cake is moist, has perfect sweetness, and is rich to bite into. This is a crowd-pleaser if you are looking for a party. The flavors mature well if you allow the cake to be set overnight in the refrigerator.
How to Make Hand Painted Cake at home?
Hand Painted Cake
Ingredients
- 1 cup all purpose flour
- ½ cup +1 tbsp sugar granulated
- ⅛ cup + 1 tsp cocoa powder unsweetened
- ¼ tsp baking soda heaped
- ¼ tsp salt
- ⅔ cup hot water
- 4 tbsp olive oil
- 2 tsp white vinegar
- 1 tsp instant coffee granules
- 1 tsp vanilla extract
Instructions
- Pre-heat oven to 180 °C. Line the bottom of one 8 inch pan.
- Whisk together flour, sugar, cocoa, baking soda & salt in a large mixing bowl. Do not use a mixer as it will not aerate the dry flours.
- Combine water, oil, vinegar, instant coffee & vanilla in a separate bowl.
- Mix the wet ingredients into the dry ingredients and whisk them till they are just combined. Do not overmix. A smooth batter is not necessary, few lumps in it are fine. If you are adding any liquor, then add it now.
- Pour batter into the prepared pan. Gently tap the pan so air bubbles are removed and batter spreads evenly.
- Bake for 20-25 mins in the preheated oven. After about 18-20 minutes, insert a tooth pick towards the side of the pan. If it comes out clean, then cake is done.
- Cool the cake in the pan on the rack for 15 minutes, then invert it on the rack. Leave it upside down to cool, it helps in flattening any dome shape. I baked three layers by baking this recipe three times separately. And then froze the layers wrapped in cling film. Continue with assembling and frosting the cake.
Notes
- Old fashioned chocolate cake is perfect as a moist base for frosting and layering cakes.
- Using coffee is optional.
Sugar Syrup
Ingredients
- ⅓ cup sugar granulated
- 1 cup water
Instructions
- Boil water & sugar together. Once it boils, lower the flame & allow it to heat for another 1 minute. Remove from heat & cool completely. It can be made in advance & stored in refrigerator.
- Use ⅓ cup of syrup to soak one layer of cake. If you are soaking White Cake then reduce the syrup per layer i.e. ¼ cup sugar in ¾ cup water. And soak each layer in ¼ cup syrup. With ⅓ cup syrup, I have found the cake to get over soaked.
for infusing flavor
- If you are infusing flavor like rose petals, then boil petals once sugar is dissolved for 5-10 minutes. Cool & strain. Continue to use for soaking and assembling.
Notes
- The more you soak the layers before filling, the more moist your cake will be.
- You can infuse this syrup with flavors of your choice. I have used it with dried rose cake by infusing it with 1 cup dried rose petals.
How to Assemble a Cake
Equipment
- piping bag, nozzles & levelling knife for decorating and finishing
- parchment paper or strips
Materials
- sugar syrup or chocolate syrup for soaking
- whipped cream or chocolate ganache or buttercream to fill & frost
- fruits, sprinkles, chocolate chips, etc for topping or filling
Instructions
- Move the frozen layers to refrigerator few hours before assembling. Place the first layer on a platter or cake stand.
- Make some holes into the bottom layer using a form. Soak the bottom layer in sugar syrup. Then lightly spread the filling of your choice like whipped cream or butter cream or chocolate ganache over it. Place the second layer on top of the bottom layer & repeat the process of soaking & spreading filling. Finally place the top layer & again soak it. Lightly spread the filling on top & sides of the cake making a crumb coat. Refrigerate the cake for 1 hour.
- Top it generously with chocolate ganache or any glaze or whipped cream or butter cream. Pipe design as you would like. Refrigerate the cake for at least 2 hours or overnight for flavors to set in. Serve chilled.
Notes
- You can whip the ganache before spreading as filling.
- The consistency of ganache for topping and filling is different. For filling, you need thick consistency (which you get by leaving the ganache at room temperature for few hours) and for pouring as topping, you need the ganache to be pouring consistency. You can re-heat/ warm up the ganache to adjust the consistency.
- I use soy-based ready-to-whip cream which is available in market. Transfer a small portion of cream in a large bowl or your stand mixer and beat till stiff peaks are achieved. Fill and frost as per your choice.


