
Homemade Ghee or Clarified Butter is the most satisfying food that one can eat. It can be made by the simplest ingredient available today i.e. milk. Milk when utilized to it’s whole potential is a rich source of may essential vitamins and minerals.
The process of making ghee or butter from scratch is a healthy and highly sustainable process as the complete process is from scratch and even the by products are not discarded. The traditional ghee or clarified butter making supports our health and eco system equally. You can enjoy buttermilk or homemade butter as a by-product.
Sustainability in food is also equally important. Our grandmothers always worked with sustainable practices in all aspects of managing homes. Butter & ghee were made at home from scratch and each of its by-products were used too. I do the same! I contribute by using every single by-product from the milk to ghee in my own home. Milk-malai-curd-butter-buttermilk-chenna-ghee for the win!

This is not as easy as it sounds, well atleast for me. How many times I promised V in last 5 yrs that I’ll give you home made butter & how many times it didn’t happen. Like all food items, V loves home made butter and I have only managed to start churning it in the last few months. So ladies like me who struggle with it or would like to learn it, here are few pointers.

The How-To is quite simple and difficult at the same time. The most important thing is to let the temperature around you govern the temperature of water. Peak summers like in Delhi, need cold water with ice-cubes also sometimes and chilly winters would need warm to hot water.

But in a moderate climate like Pune, I usually use room temperature water only, with very occasionally using cold or lukewarm water.

Weather or room temperature determines this process – In winters use hot to room temp water for all steps. In summer, you would need chilled water or ice for separating & washing. As the butter needs to stick together to form a blob and in summers due to heat, its very flowy in nature we need chilled water. In winters the room temperature is lower so it forms a firm blob together much easily and doesn’t need cold water.

The process of utilizing the cream of milk to make ghee is a zero waste process. here, we get white butter, buttermilk, which can be used to make kadhi and the residue of ghee used to knead in dough for making parathas or adding milk and sugar to make sweets.
There is no bigger pleasure than liberally smearing your Indian flatbread with homemade ghee. I have come across few clarified butter bakes too and would soon be trying them out.
Stay tuned.
FAQs
Clarified butter is a type of butter that has been purified by removing the water content, milk solids, and impurities, leaving behind only the clear, golden fat. This process results in a butter that has a higher smoke point and a longer shelf life compared to regular butter.
Clarified butter is a versatile and stable cooking fat that offers the rich flavor of butter without the water and milk solids. It’s particularly valued in cuisines that require high-heat cooking and is a staple in many traditional recipes.
Ghee and clarified butter are similar in that they both involve the process of removing water and milk solids from butter, leaving behind pure butterfat. However, there are key differences between the two:
1. Preparation Process
Clarified Butter:
Melting: Butter is gently melted until it separates into three layers: foam on top (water content), clear yellow liquid in the middle (butterfat), and milk solids at the bottom.
Separation: The foam is skimmed off, and the clear yellow butterfat is carefully poured off or strained, leaving the milk solids behind.
End Result: The process stops here, resulting in a clear, golden fat with a mild buttery flavor.
Ghee:
Extended Cooking: After the butter separates, it is cooked longer than clarified butter. This extra cooking time allows the milk solids to caramelize and brown slightly.
Straining: The browned milk solids are then strained out, leaving a more deeply flavored, aromatic fat.
End Result: Ghee has a richer, nuttier flavor and a darker color due to the caramelization of the milk solids.
2. Flavor and Aroma
Clarified Butter: Has a mild, pure butter flavor with no significant aroma.
Ghee: Has a more complex, nutty, and caramel-like flavor, with a distinct aromatic quality due to the browning of milk solids.
3. Cultural and Culinary Uses
Clarified Butter: Commonly used in Western cooking, particularly in French cuisine for making sauces (like hollandaise) and for sautéing and frying at higher temperatures.
Ghee: Widely used in Indian, Middle Eastern, and Southeast Asian cooking. It’s a staple in Indian cuisine, used for cooking, frying, and even as a spread or drizzle over foods.
4. Shelf Life and Storage
Clarified Butter: Can be stored at room temperature but is often kept refrigerated to extend its shelf life. It can last several months if stored properly.
Ghee: Due to the extended cooking process that removes more moisture, ghee is more shelf-stable than clarified butter. It can be stored at room temperature for several months or even longer, depending on the conditions.
5. Nutritional Content
Clarified Butter: Contains only the pure butterfat and is free from milk solids and water.
Ghee: Also primarily butterfat, but the browning of milk solids may add slight differences in nutritional composition, particularly in flavor compounds.
Conclusion
While both ghee and clarified butter are forms of purified butterfat, ghee undergoes an additional cooking step that caramelizes the milk solids, giving it a unique flavor and longer shelf life. Clarified butter, on the other hand, is simply butterfat without the milk solids and water, offering a milder flavor. The choice between the two depends on the flavor profile you’re looking for and the culinary traditions you’re following.
Whether ghee or butter is healthier depends on individual health needs, dietary goals, and how each is used in cooking. Both ghee and butter have their own set of benefits and potential drawbacks.
Ghee may be the healthier option for those who are lactose intolerant, need a high smoke point fat for cooking, or are looking for the potential benefits of butyrate and CLA.
Butter can be a good choice for those who enjoy its flavor and don’t have dairy sensitivities, especially when used in moderation.
In both cases, the key is moderation. Including a variety of fats in your diet, such as olive oil, avocado, and nuts, alongside ghee or butter, can help you achieve a balanced intake of healthy fats.
Easy Homemade Ghee Recipe
How To Make Ghee or Clarified Butter
Materials
- full cream milk
- 1 tbsp yogurt homemade curd
- 1 litre cold water or ice
Instructions
- Boil milk. After the milk boils, keep it aside without disturbing it, so that cream can form on the upper layer of milk. Refrigerate this milk.
- After a few hours of refrigeration, the top layer will firm into a thick cream layer.
- Gently remove the cream and store in a separate bowl. Store the cream bowl back in the refrigerator.
- Repeat this process till you have collected enough quantity of cream. (1 litre of boiled milk should give around 250 ml of cream in 7-8 days)
- Warm the collected cream and allow it to cool a little. When it is cooled just enough for setting of curd, add 1 tablespoon of curd into it and mix well. For setting curd, the temperature should be lukewarm – neither too hot nor too cold.
- Allow the cream to set just like curd in a warm place. When the cream is set, refrigerate it. I usually allow it to set for 3-4 hours and then keep it back in refrigerator for 10-12 hours or overnight before churning butter out of it.
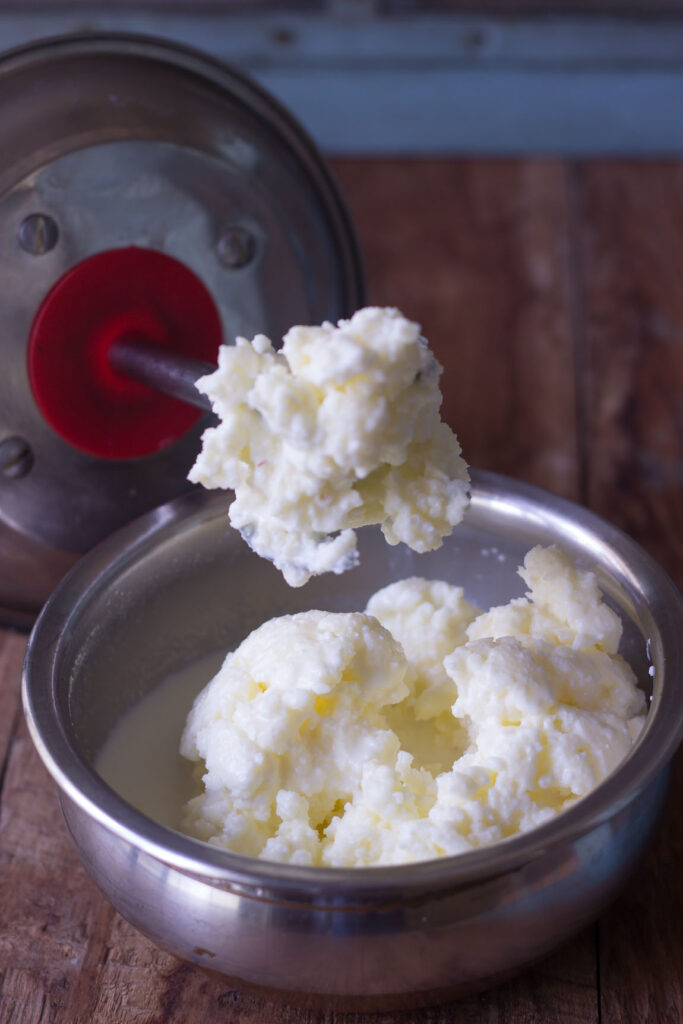
- Remove the set cream and allow it to come to room temperature for an hour or two. Then churn using a stick blender. I use a local-made, heavy duty stick blender which is used in many households specifically for churning butter only. Check the image above.
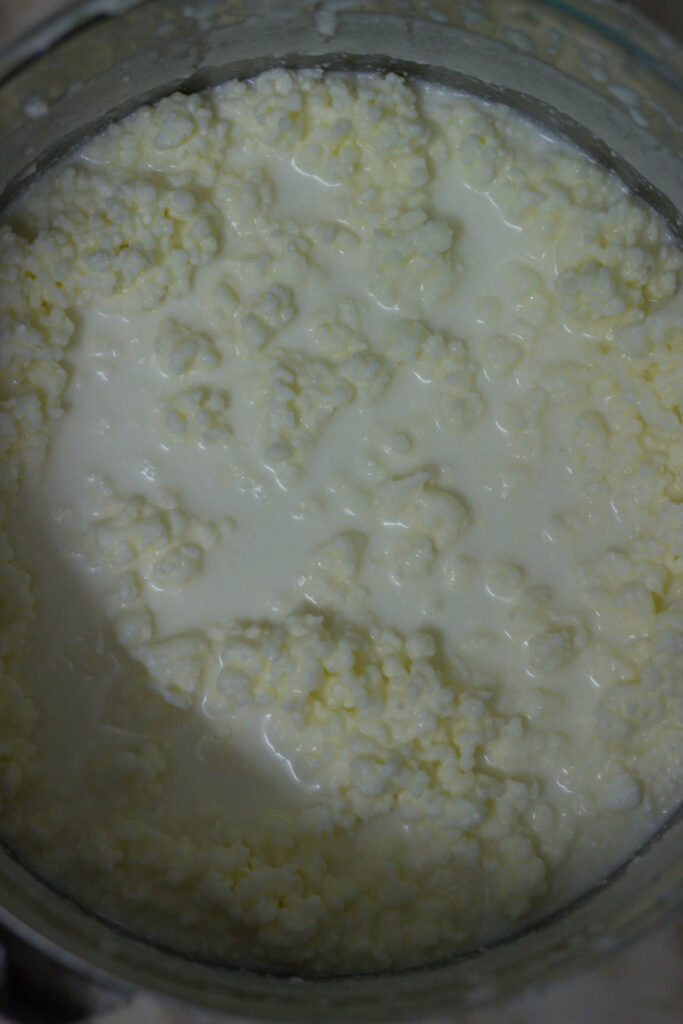
- After a few mins, the cream will start separating and you will see butter. Add cold water if required to separate. The amount and the temperature of water needed depends upon the weather conditions as well as how soon you started churning the butter after removing set cream from refrigerator.
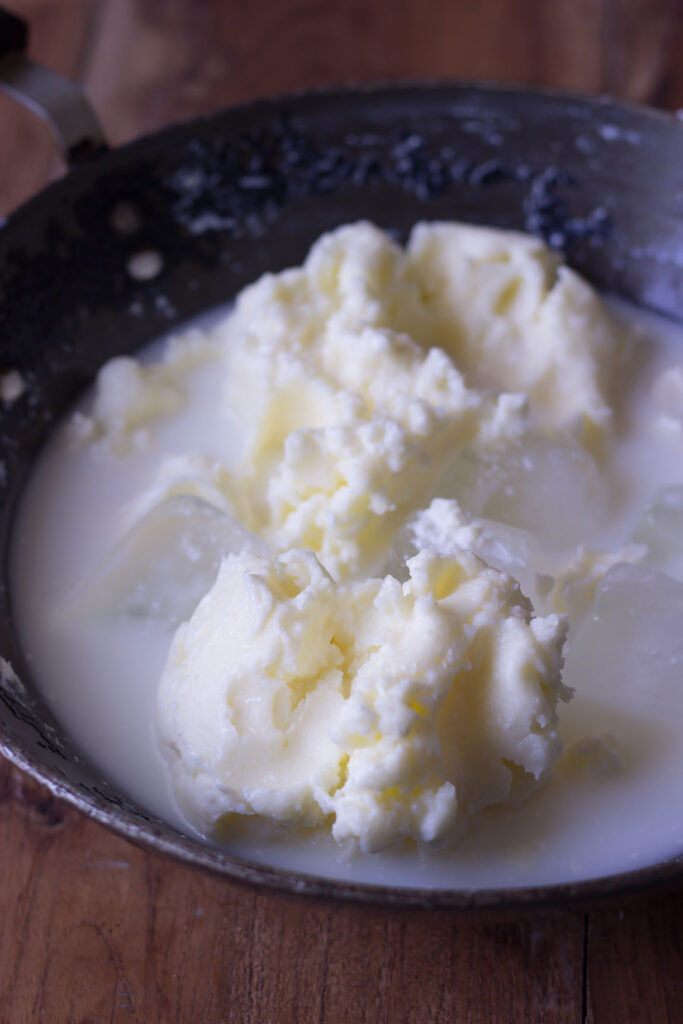
- The butter & milk should be clearly separated where the butter floats above and forms big blobs.
- In a wok, take about half glass of chilled water or ice and remove the butter & put in it.
- Quickly rinse off the butter in this water. Continue rinsing the butter in cold water and removing the discarded water in a separate vessel.
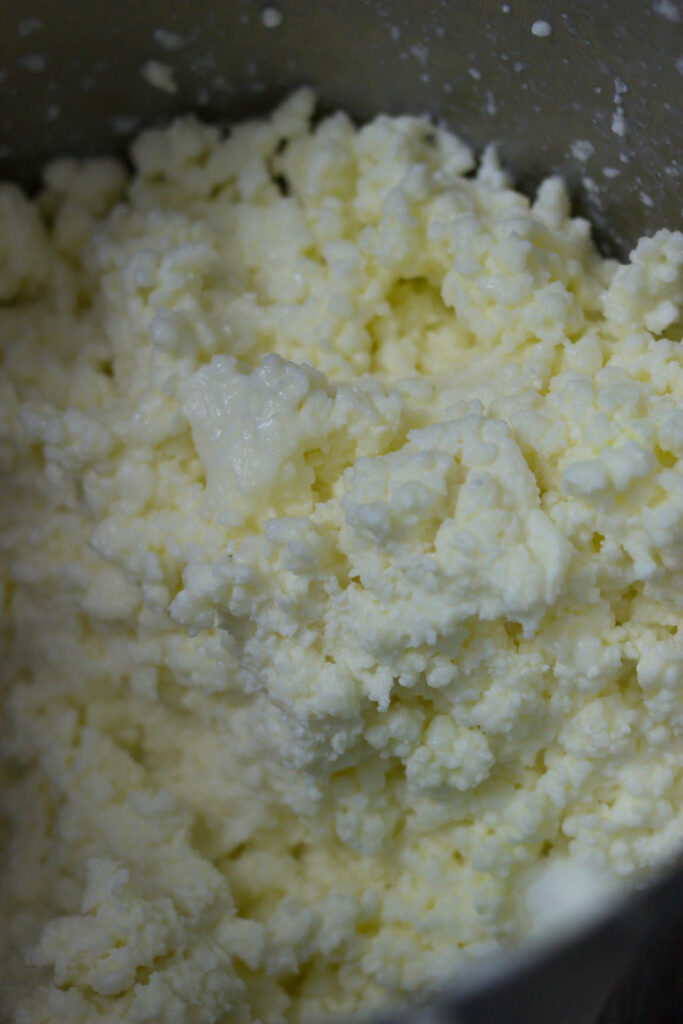
- Repeat it till the water no longer turns milky on rinsing but it remains transparent. This is the indication that milk and butter have separated completely.
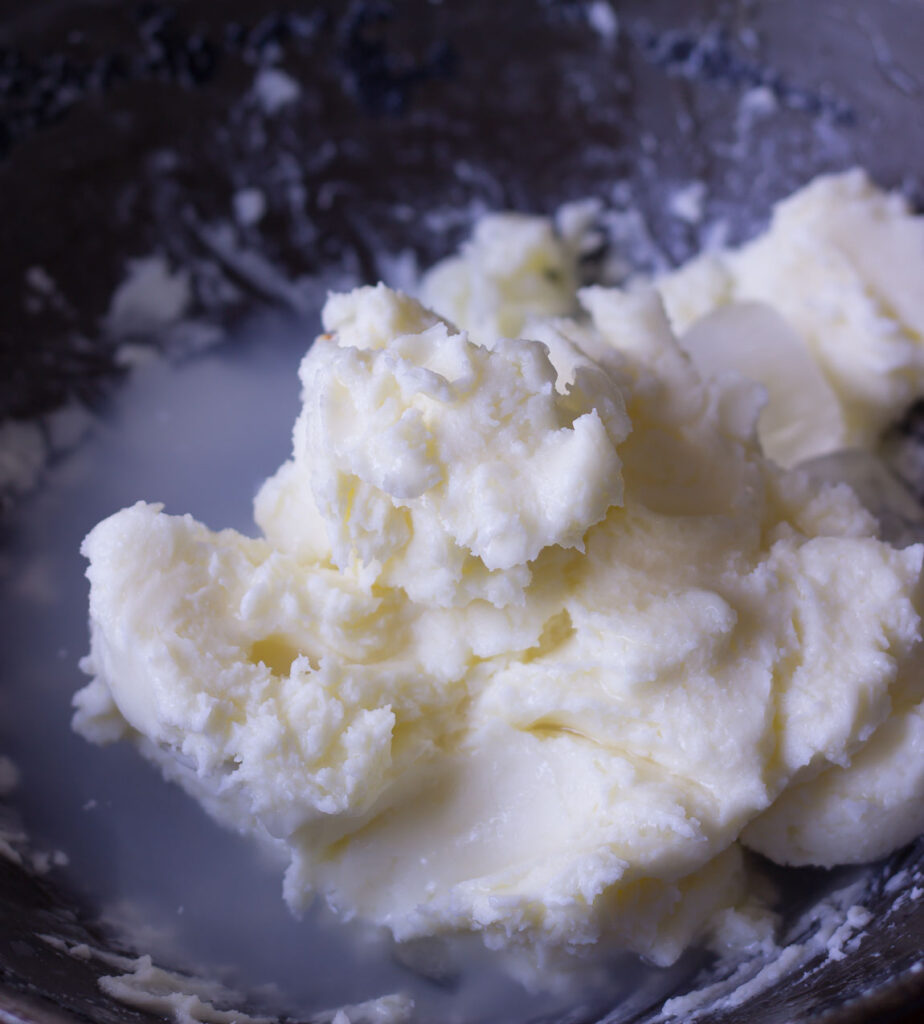
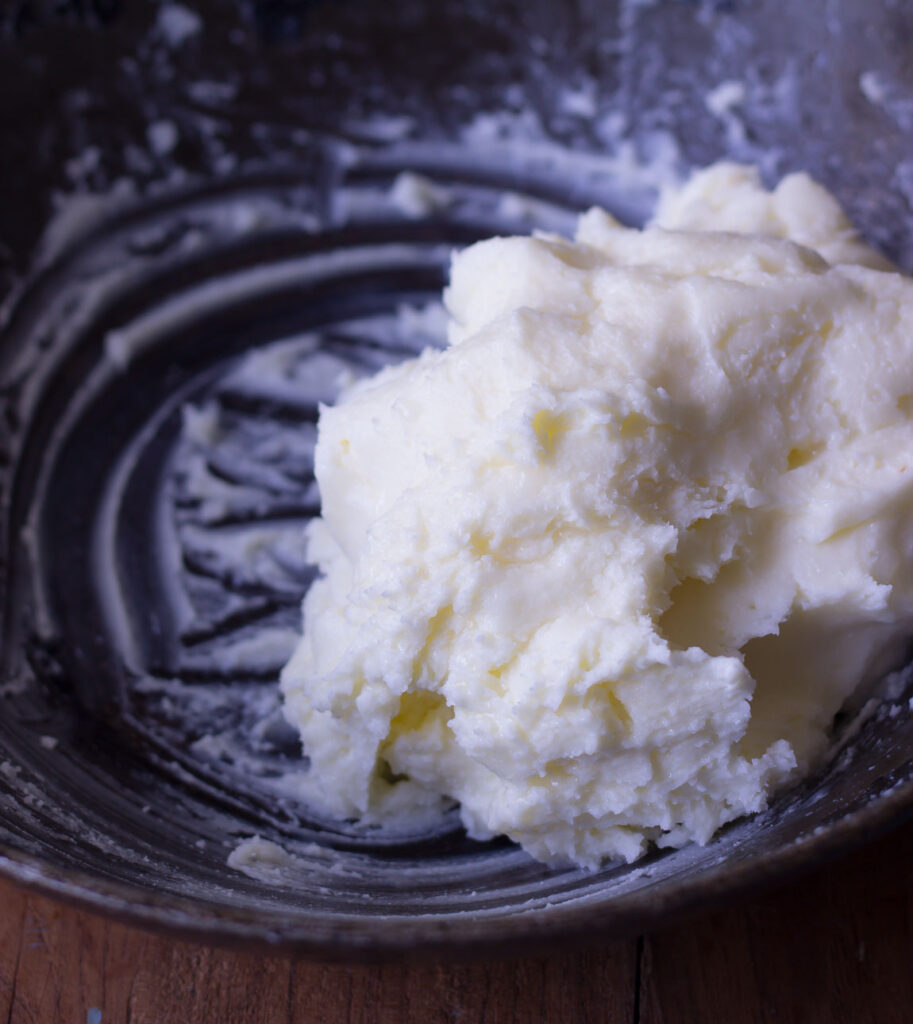
- By now the butter comes together in a big big blob. By the end of this step we have one vessel of butter milk (which is discarded water which we rinsed butter with) and homemade butter.
- You can garnish buttermilk with seasoning (ghee, cumin seeds, salt, mint leaves) & serve or plain. Use butter as desired.
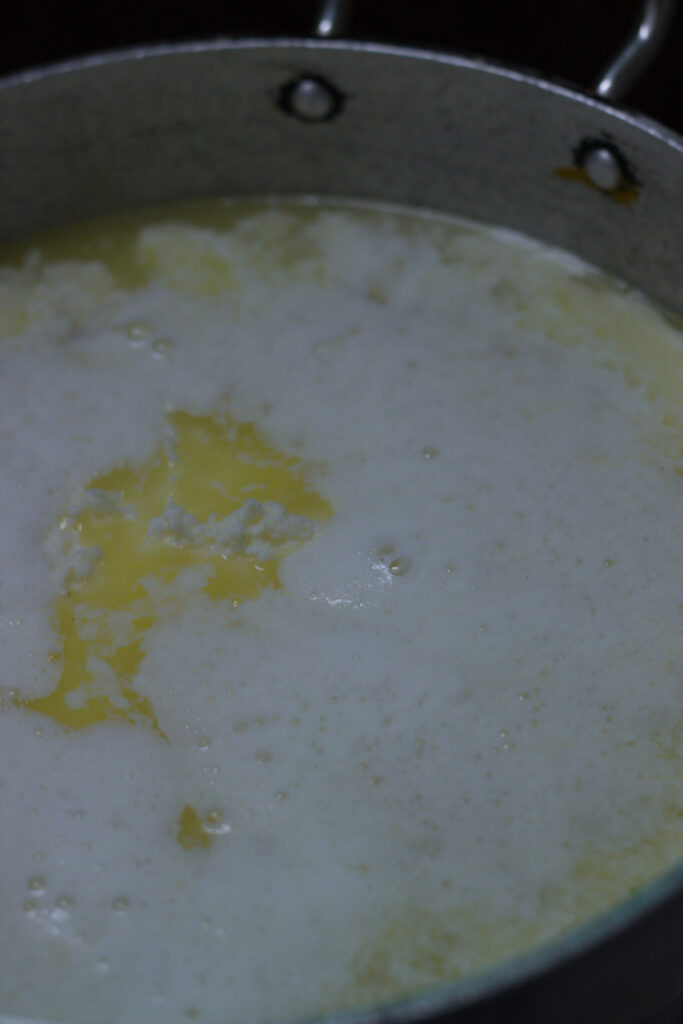
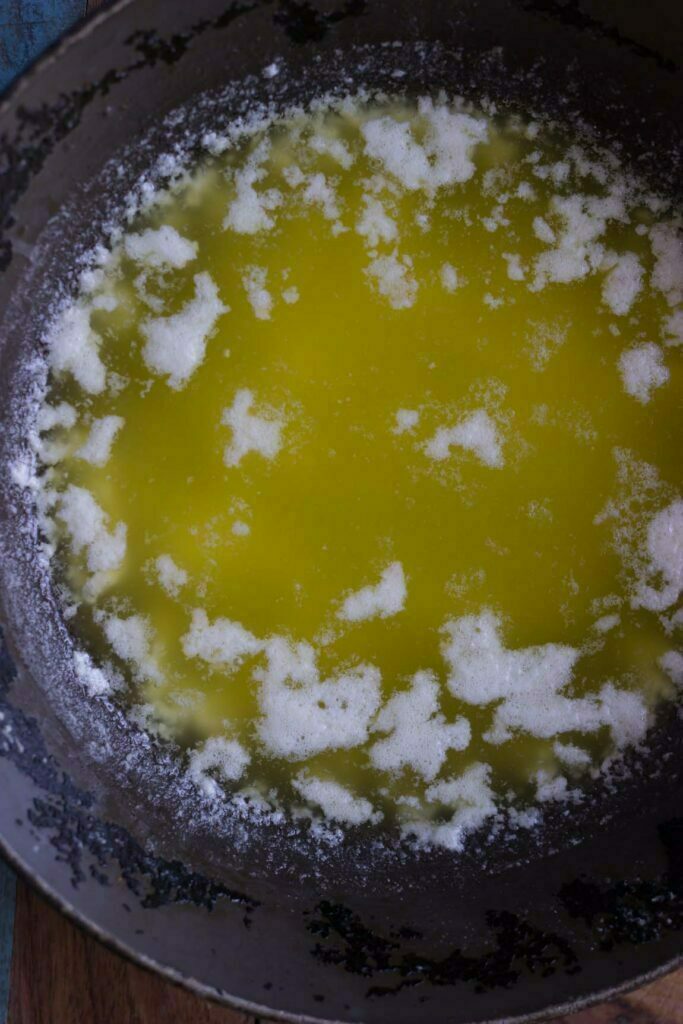
- If you do not want to use the butter here, then put the prepared butter in a wok and allow it to slowly melt into ghee or clarified butter over slow flame.
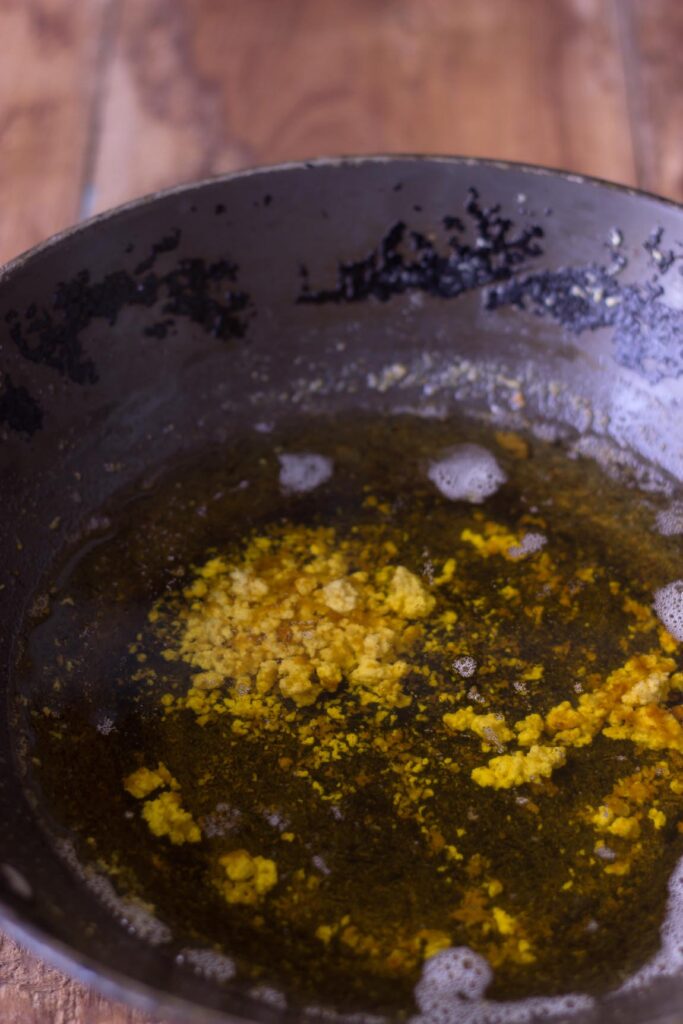
- Slowly, the water content will evaporate leaving behind ghee or clarified butter. Residue will dry and become elastic and chewy chenna.
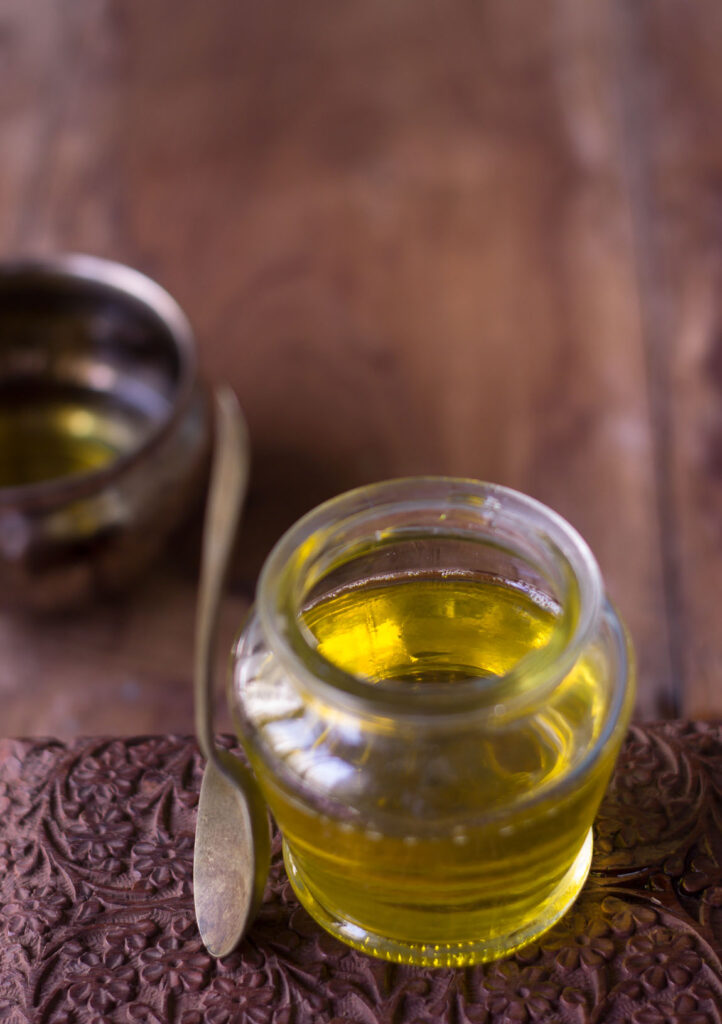
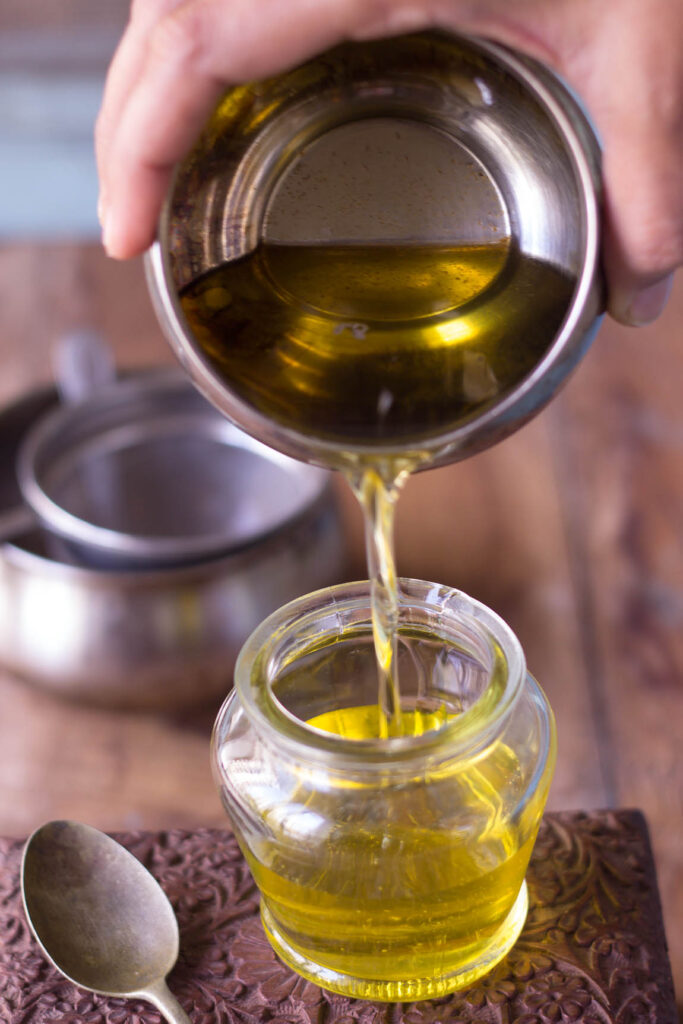
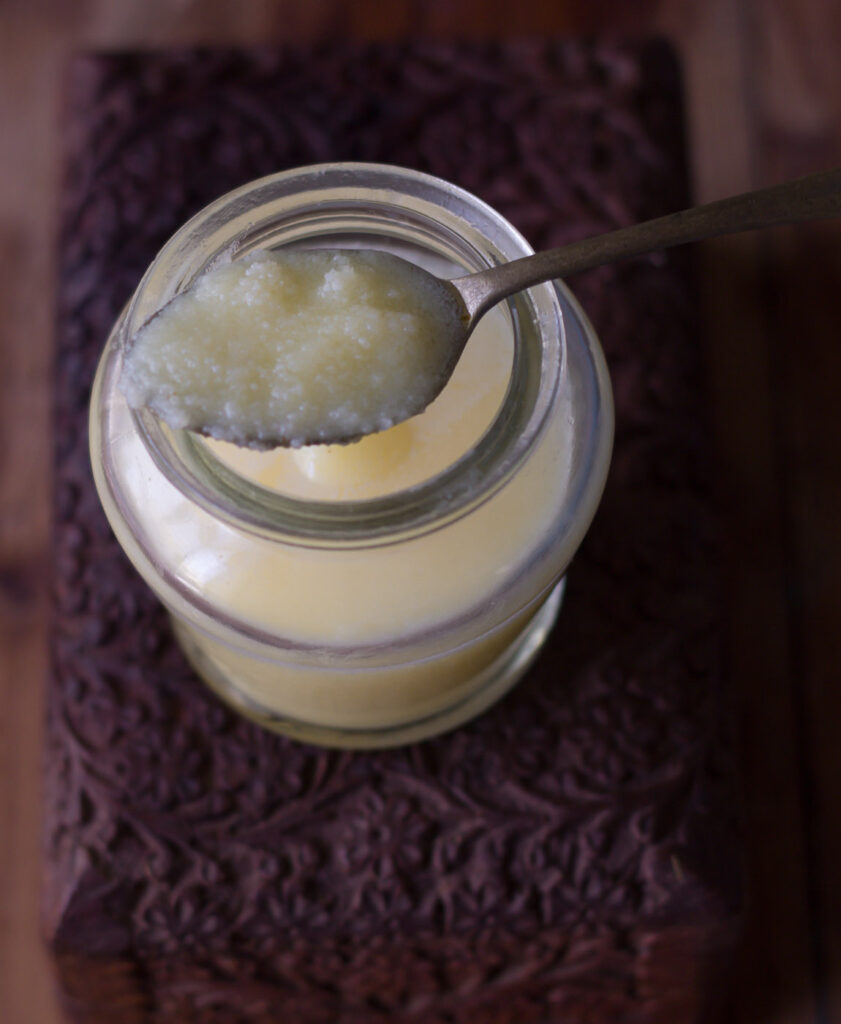
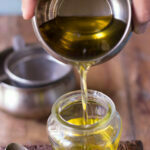
- Strain the ghee into the desired container. I usually store in a steel or glass container with wide mouth. The ghee can be stored at room temperature and used as per need. Use as desired.
- Remove the chenna from strainer & use it to knead parantha dough. This yields a soft & crumbly parantha with rich taste.
- Alternatively you can create after meal snack from this chenna by simply adding powdered sugar to it. Kids love it & it becomes a wonderful on the go snack.
Notes
- This process of making ghee is a healthy and highly sustainable process as the complete process is from scratch and even the by products are not discarded. The traditional ghee making supports our health and eco system equally.
- The process of utilizing the cream of milk to make ghee is a zero waste process. here, we get white butter, buttermilk, which can be used to make kadhi and the residue of ghee used to knead in dough for making parathas or adding milk and sugar to make sweets.
- Weather or room temperature determines this process – In winters use hot to room temp water for all steps. In summer, you would need chilled water or ice for separating & washing. As the butter needs to stick together to form a blob and in summers due to heat, its very flowy in nature we need chilled water. In winters the room temperature is lower so it forms a firm blob together much easily and doesn’t need cold water.
- You can discard any of the by-product if you wish but I like being judicious. I guess you can put it on my mom inculcating ‘Don’t waste unnecessarily’. I just love the thought of using a product & all its by-products (milk-curd-cream-butter-buttermilk-ghee-chenna).
- Ghee is surely being now considered as the “Liquid Gold” for it’s endless health benefits from our heart health, skin, hair, digestion and good sleep routine.