
 Print Recipe
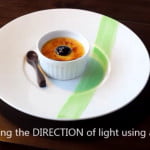
Basics of Food Photography | Tutorial 2 is from the weekly series of some easy tips to create amazing food images using your smart phone or a mobile device.
Learn from this series on my YouTube channel or read more about them as tutorial 1, tutorial 3, tutorial 4, tutorial 5.
I drool on some serious food porn posted on Instagram daily. The more I see around the more determined I got to learn what others knew.
It wasn’t easy as people are not willing to share their information or knowledge easily. Yes, that’s the ugly truth of Blogging world.
I am nothing if not persistent.
After a lot of hard work, I can boast that even my images are now my USP on the blog here, which is big achievement for me. I am happy to share the knowledge on food photography which I gained over the years.
In the first video we had discussed which orientation to choose and create depth of field, in the second video we will explore how to create a story or frame your composition.
In this video we will understand how to create a story or compose a shot when shooting food through your Smartphone. Chef Akhilesh has prepared Evviva’s signature dishes for us to shoot like Asharfi Murg Tikka, Afghani Zhinga Kebab, Bread, Dal-e-Evviva and Nalli-Nihari.
Since we were at a lounge, there was a cocktail and a beer bottle. Rearrange the dishes to bring focus to HERO dish, let the other dishes be in the background as part of adding story.
Choose the story you wish to create and accordingly compose your shot including choosing the angle, props, etc.
Some foods do not look good when shot at close-ups or are already bitten into. But if you wish to portray a sense of enjoying a meal or even a plate ready to be dug into, then I suggest moving further away from the food, allowing background like serving hot-pots, bread basket etc. to come in the frame. Certain food look unappetising when zoomed in. So choose your composition wisely.
Key Points:
- Remove clutter from the background.
- Compose your shot bringing HERO into focus.
- Choose objects, props which will complement your HERO.
- Avoid too close-ups of half eaten food.
If you like the video, Subscribe to the channel, Like, Comment and Share.


Thanks for making a second part of the tutorial. Food photography is really an interesting job. However, it requires good patience unlike other arts of photography.
Yes Cherie that’s true. I am glad you enjoyed the second part. Third part is going live this Friday.