 Print Recipe
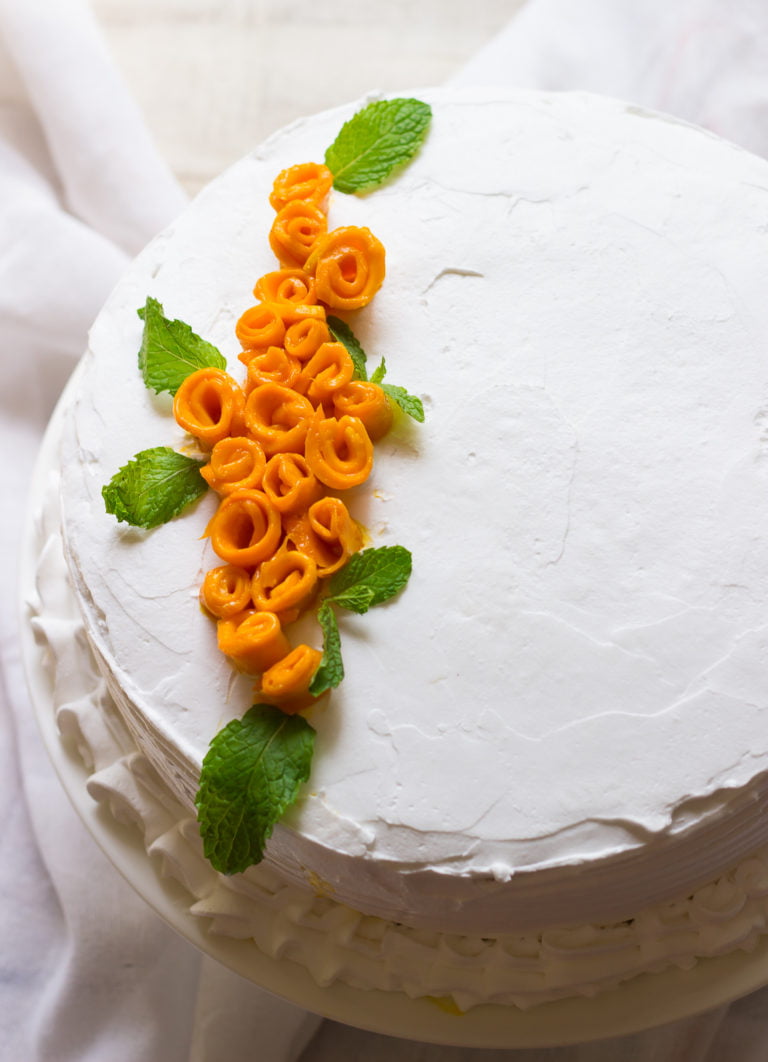
This Spiderman Cake for kids is truly a centerpiece of your beloved son’s birthday and no bakery-bought cake can compete with a labor of love. The Spiderman chocolate cake is all things that you wish the growing-up lad to accomplish and be. Bold, soft, moist at the core.
It’s that time of the year, when I bake my son a Spiderman birthday cake. This year was special because he turned 10. I can’t believe it! Time flew by so fast. The past cakes I baked for my son’s birthday are Sachertorte, nerf gun cake, and race track cake.

I wanted to go another level up with my cake decoration skills and tried sticking to a theme. I chose Spider-Man as he is in that superhero craze phase – especially Avengers and Marvel superheroes! If you are looking for easy cake ideas, then this is the simplest to start with.
I chose my favorite go-to chocolate cake and just used ganache as a filling and colored whipping cream to frost.

Spiderman theme cake made Daddy Dear participate by making spider webs for his boy. That’s what I call celebrating the birthday like a family—the perfection of love and love which only parents and family can give.
The cake is super moist and melts in the mouth. If you haven’t tried this recipe, you must, must try!
How to Make Spiderman Cake at Home?

Spiderman Cake
Ingredients
- 1 cup all purpose flour
- ½ cup +1 tbsp sugar granulated
- ⅛ cup + 1 tsp cocoa powder unsweetened
- ¼ tsp baking soda heaped
- ¼ tsp salt
- ⅔ cup hot water
- 4 tbsp olive oil
- 2 tsp white vinegar
- 1 tsp instant coffee granules
- 1 tsp vanilla extract
Instructions
- Start by bringing all the ingredients to room temperature if they were refrigerated. It’s best to keep the refrigerated ingredients on the counter 30 minutes prior to baking.
- Preheat the oven to 350 °F (180 °C). Grease an 8 inch round pan with butter or line it with parchment paper. I used baking spray which worked great.
- Whisk together flour, sugar, cocoa, baking soda & salt in a large mixing bowl. Do not use a stand or a hand mixer. This step is important as whisking the mixture will aerate it well and you will get a perfect cake with great crumb.
- In a separate small bowl combine water, oil, vinegar, instant coffee & vanilla extract.
- Add wet ingredients to the dry ingredients & whisk till just combined. A smooth batter is not necessary, few lumps are fine.
- Pour the batter into the prepared 8 inch round pan.
- Tap the pan gently 2-3 times to remove air bubbles and batter spreads evenly.
- Bake in preheated oven at 350 °F (180 °C) for 20-25 mins or till a toothpick inserted into the cake comes out clean
- Cool the cake in the pan on the rack for 15 minutes, then invert it on the rack.
- Leave it upside down to cool, it helps in flattening any dome shape.
- I usually bake three layers by baking this recipe thrice separately or in 3 pans ahead of time.
- Then I freeze these layers wrapped in cling film till 24 hours prior to the assembling and decorating.
- You can decorate the cake as per your wish using basic decorating guidelines at assembling and frosting the cake.
Notes
- This cake is perfect as moist base for frosting and layering.
- Using coffee is optional.
- Measure the ingredients correctly. Use standard cups and spoon measures to measure them.
- All the ingredients must be at room temperature.
- Use best quality ingredients to make this cake.
- After adding the flour, do not overmix the batter.
- This recipe can be halved, doubled, or tripled. Make sure to use the baking pan accordingly. The baking time will also differ.
Sugar Syrup
Ingredients
- ⅓ cup sugar granulated
- 1 cup water
Instructions
- Boil water & sugar together. Once it boils, lower the flame & allow it to heat for another 1 minute. Remove from heat & cool completely. It can be made in advance & stored in refrigerator.
- Use ⅓ cup of syrup to soak one layer of cake. If you are soaking White Cake then reduce the syrup per layer i.e. ¼ cup sugar in ¾ cup water. And soak each layer in ¼ cup syrup. With ⅓ cup syrup, I have found the cake to get over soaked.
for infusing flavor
- If you are infusing flavor like rose petals, then boil petals once sugar is dissolved for 5-10 minutes. Cool & strain. Continue to use for soaking and assembling.
Notes
- The more you soak the layers before filling, the more moist your cake will be.
- You can infuse this syrup with flavors of your choice. I have used it with dried rose cake by infusing it with 1 cup dried rose petals.
How to Assemble a Cake
Equipment
- piping bag, nozzles & levelling knife for decorating and finishing
- parchment paper or strips
Materials
- sugar syrup or chocolate syrup for soaking
- whipped cream or chocolate ganache or buttercream to fill & frost
- fruits, sprinkles, chocolate chips, etc for topping or filling
Instructions
- Move the frozen layers to refrigerator few hours before assembling. Place the first layer on a platter or cake stand.
- Make some holes into the bottom layer using a form. Soak the bottom layer in sugar syrup. Then lightly spread the filling of your choice like whipped cream or butter cream or chocolate ganache over it. Place the second layer on top of the bottom layer & repeat the process of soaking & spreading filling. Finally place the top layer & again soak it. Lightly spread the filling on top & sides of the cake making a crumb coat. Refrigerate the cake for 1 hour.
- Top it generously with chocolate ganache or any glaze or whipped cream or butter cream. Pipe design as you would like. Refrigerate the cake for at least 2 hours or overnight for flavors to set in. Serve chilled.
Notes
- You can whip the ganache before spreading as filling.
- The consistency of ganache for topping and filling is different. For filling, you need thick consistency (which you get by leaving the ganache at room temperature for few hours) and for pouring as topping, you need the ganache to be pouring consistency. You can re-heat/ warm up the ganache to adjust the consistency.
- I use soy-based ready-to-whip cream which is available in market. Transfer a small portion of cream in a large bowl or your stand mixer and beat till stiff peaks are achieved. Fill and frost as per your choice.


Join the Conversation
We'd love to hear your thoughts